IDEA Note

  • An error occurred (InvalidParameterException) when calling the PutSubscriptionFilter operation: Could not execute the lambda function. Make sure you have given CloudWatch Logs permission to execute your function.

    An error occurred (InvalidParameterException) when calling the PutSubscriptionFilter operation: Could not execute the lambda function. Make sure you have given CloudWatch Logs permission to execute your function.

     CloudWatch logs から lambda subscription-filter しようとした際、以下のようなエラーになった。

    An error occurred (InvalidParameterException) when calling the PutSubscriptionFilter operation: Could not execute the lambda function. Make sure you have given CloudWatch Logs permission to execute your function.

    対処法は以下の通り lambda に対しパーミッションを追加する必要がある

    aws --profile mfa  lambda add-permission --function-name "lambda function name"  \
    --statement-id "lambdapermission-xxxxxxxxx-uniq"  \
    --principal "logs.ap-northeast-1.amazonaws.com"  \
    --action "lambda:InvokeFunction"  \
    --source-arn "arn:aws:logs:ap-northeast-1:1234567890:log-group:/aws/lambda/hogehoge-lambda-function:*"  \
    --source-account "1234567890" --region=ap-northeast-1


  • entrypoint の設定された docker の中に入る

    entrypoint の設定された docker の中に入る

    概要

    docker では entrypoint が設定されていると、
    docker の中に入るために 起動シェルを変更したとしても
    entrypoint の引数として認識されてしまう事がある。

    entrypoint を変更する事で、コンテナ内に入る事が可能になる。

    “`

    docker run -it --rm --entrypoint /bin/bash tsukada/image


  • Valid Login :: A test suite with a single test for valid login.

    Valid Login :: A test suite with a single test for valid login.

    概要

    robot framework を実施しようとしてエラーになった。

    `Valid Login :: A test suite with a single test for valid login. ` 

    その対策についてまとめる。

    エラー内容

    geckodriver の version が古いとエラーになる

    ==============================================================================
    Valid Login :: A test suite with a single test for valid login.               
    ==============================================================================
    Valid Login                                                           | FAIL |
    WebDriverException: Message: newSession
    ------------------------------------------------------------------------------
    Valid Login :: A test suite with a single test for valid login.       | FAIL |
    1 critical test, 0 passed, 1 failed
    1 test total, 0 passed, 1 failed
    ==============================================================================
    Output:  /private/tmp/WebDemo/output.xml
    Log:     /private/tmp/WebDemo/log.html
    Report:  /private/tmp/WebDemo/report.html

    geckodriver -hを行なったところ、 version は

    geckodriver 0.19.0 だった。

    対処法

    geckodriverを新しくすることで解決できる

    https://github.com/mozilla/geckodriver/releases/tag/v0.26.0

    をダウンロード

    その後、

    `mv geckodriver  /usr/local/bin`

    を実施して移動させる。

    geckodriver -h

    すると

    `geckodriver 0.26.0 (e9783a644016 2019-10-10 13:38 +0000) `

    になったことを確認。

    再度 robot framework を実施すると、パスできるようになった。

    ==============================================================================
    Valid Login :: A test suite with a single test for valid login.               
    ==============================================================================
    Valid Login                                                           | PASS |
    ------------------------------------------------------------------------------
    Valid Login :: A test suite with a single test for valid login.       | PASS |
    1 critical test, 1 passed, 0 failed
    1 test total, 1 passed, 0 failed
    ==============================================================================
    Output:  /private/tmp/WebDemo/output.xml
    Log:     /private/tmp/WebDemo/log.html
    Report:  /private/tmp/WebDemo/report.html


  • amazon linux2 に python3 を instlal する

    amazon linux2 に python3 を instlal する

    結論から。

    以下の一行のみ。

    yum install python3

    実施結果は以下の通り

    # yum install python3
    Loaded plugins: fastestmirror
    Loading mirror speeds from cached hostfile
     * base: mirror.team-cymru.com
     * epel: mirror.steadfastnet.com
     * extras: mirrors.liquidweb.com
     * remi-safe: mirror.team-cymru.com
     * updates: centosz6.centos.org
    Resolving Dependencies
    --> Running transaction check
    ---> Package python3.x86_64 0:3.6.8-13.el7 will be installed
    --> Processing Dependency: python3-libs(x86-64) = 3.6.8-13.el7 for package: python3-3.6.8-13.el7.x86_64
    --> Processing Dependency: python3-setuptools for package: python3-3.6.8-13.el7.x86_64
    --> Processing Dependency: python3-pip for package: python3-3.6.8-13.el7.x86_64
    --> Processing Dependency: libpython3.6m.so.1.0()(64bit) for package: python3-3.6.8-13.el7.x86_64
    --> Running transaction check
    ---> Package python3-libs.x86_64 0:3.6.8-13.el7 will be installed
    --> Processing Dependency: libtirpc.so.1()(64bit) for package: python3-libs-3.6.8-13.el7.x86_64
    ---> Package python3-pip.noarch 0:9.0.3-7.el7_7 will be installed
    ---> Package python3-setuptools.noarch 0:39.2.0-10.el7 will be installed
    --> Running transaction check
    ---> Package libtirpc.x86_64 0:0.2.4-0.16.el7 will be installed
    --> Finished Dependency Resolution
    
    Dependencies Resolved
    
    ============================================================================================================================================================================================================
     Package                                                 Arch                                        Version                                             Repository                                    Size
    ============================================================================================================================================================================================================
    Installing:
     python3                                                 x86_64                                      3.6.8-13.el7                                        base                                          69 k
    Installing for dependencies:
     libtirpc                                                x86_64                                      0.2.4-0.16.el7                                      base                                          89 k
     python3-libs                                            x86_64                                      3.6.8-13.el7                                        base                                         7.0 M
     python3-pip                                             noarch                                      9.0.3-7.el7_7                                       updates                                      1.8 M
     python3-setuptools                                      noarch                                      39.2.0-10.el7                                       base                                         629 k
    
    Transaction Summary
    ============================================================================================================================================================================================================
    Install  1 Package (+4 Dependent packages)
    
    Total download size: 9.5 M
    Installed size: 48 M
    Is this ok [y/d/N]: y   
    Downloading packages:
    (1/5): libtirpc-0.2.4-0.16.el7.x86_64.rpm                                                                                                                                            |  89 kB  00:00:01     
    (2/5): python3-3.6.8-13.el7.x86_64.rpm                                                                                                                                               |  69 kB  00:00:01     
    (3/5): python3-setuptools-39.2.0-10.el7.noarch.rpm                                                                                                                                   | 629 kB  00:00:00     
    (4/5): python3-pip-9.0.3-7.el7_7.noarch.rpm                                                                                                                                          | 1.8 MB  00:00:00     
    (5/5): python3-libs-3.6.8-13.el7.x86_64.rpm                                                                                                                                          | 7.0 MB  00:00:00     
    ------------------------------------------------------------------------------------------------------------------------------------------------------------------------------------------------------------
    Total                                                                                                                                                                       3.7 MB/s | 9.5 MB  00:00:02     
    Running transaction check
    Running transaction test
    Transaction test succeeded
    Running transaction
      Installing : libtirpc-0.2.4-0.16.el7.x86_64                                                                                                                                                           1/5 
      Installing : python3-setuptools-39.2.0-10.el7.noarch                                                                                                                                                  2/5 
      Installing : python3-libs-3.6.8-13.el7.x86_64                                                                                                                                                         3/5 
      Installing : python3-3.6.8-13.el7.x86_64                                                                                                                                                              4/5 
      Installing : python3-pip-9.0.3-7.el7_7.noarch                                                                                                                                                         5/5 
      Verifying  : python3-pip-9.0.3-7.el7_7.noarch                                                                                                                                                         1/5 
      Verifying  : python3-3.6.8-13.el7.x86_64                                                                                                                                                              2/5 
      Verifying  : libtirpc-0.2.4-0.16.el7.x86_64                                                                                                                                                           3/5 
      Verifying  : python3-setuptools-39.2.0-10.el7.noarch                                                                                                                                                  4/5 
      Verifying  : python3-libs-3.6.8-13.el7.x86_64                                                                                                                                                         5/5 
    
    Installed:
      python3.x86_64 0:3.6.8-13.el7                                                                                                                                                                             
    
    Dependency Installed:
      libtirpc.x86_64 0:0.2.4-0.16.el7               python3-libs.x86_64 0:3.6.8-13.el7               python3-pip.noarch 0:9.0.3-7.el7_7               python3-setuptools.noarch 0:39.2.0-10.el7              
    
    Complete!
    

    pip3 も一緒にインストールされる


  • GCPで利用する鍵を変更する

    GCPで利用する鍵を変更する

    tl;dr;

    GCP で key を有効化する手順についてよく忘れるのでメモ。

    Activate

    service account によって払い出した key を読み込む

    gcloud auth activate-service-account --key-file xxxx.json 
    Activated service account credentials for: [xxxx@xxxx.iam.gserviceaccount.com]
    

    確認

    Cloud Storage に対する確認を行いたい場合、以下の様にアクセスする。

    gsutil ls gs://hogehoge-bucket/                


  • GCP(CloudStorage) で署名付き URL を作成する

    GCP(CloudStorage) で署名付き URL を作成する

    tl;dr;

    GCP(CloudStorage) で署名付き URL を作成する方法を紹介します。

    方法

    requirements.txt にoauth2client を記載します。

    oauth2client

    install します。

    pip3 install -r requirements.txt  

    python でスクリプトを書きます。今回は 120秒間だけ見せることにしました。

    import time
    import urllib 
    from datetime import datetime, timedelta 
    import os
    import base64 
    from oauth2client.service_account import ServiceAccountCredentials
     
    API_ACCESS_ENDPOINT = 'https://storage.googleapis.com'
     
    def sign_url(bucket, bucket_object, method, expires_after_seconds=120):
        gcs_filename = '/%s/%s' % (bucket, bucket_object)
        content_md5, content_type = None, None
     
        credentials = ServiceAccountCredentials.from_json_keyfile_name('xxxxxxxx.json')
        google_access_id = credentials.service_account_email
     
        expiration = datetime.now() + timedelta(seconds=expires_after_seconds)
        expiration = int(time.mktime(expiration.timetuple()))
     
        signature_string = '\n'.join([
            method,
            content_md5 or '',
            content_type or '',
            str(expiration),
            gcs_filename])
        _, signature_bytes = credentials.sign_blob(signature_string)
        signature = base64.b64encode(signature_bytes)
     
        query_params = {'GoogleAccessId': google_access_id,
                        'Expires': str(expiration),
                        'Signature': signature}
     
        return '{endpoint}{resource}?{querystring}'.format(
            endpoint=API_ACCESS_ENDPOINT,
            resource=gcs_filename,
            querystring=urllib.parse.urlencode(query_params))
     
     
    if __name__ == '__main__':
        url = sign_url('project-name', 'test/coco.png', 'GET')
        print(url)

    黄色で塗った部分が、主に変更する場所になります。

    結果

    python3 main.py                               
    https://storage.googleapis.com/project/test/coco.png?GoogleAccessId=signed-url%40project&Expires=1581540902&Signature=xxxx


    • 左側が有効期限内にアクセスした時に見える結果です
    • 右側が有効期限が過ぎた際に見える結果です

    参考情報

    https://cloudpack.media/45121


  • FATAL ERROR: Ineffective mark-compacts near heap limit Allocation failed – JavaScript heap out of memory

    FATAL ERROR: Ineffective mark-compacts near heap limit Allocation failed – JavaScript heap out of memory

    はじめに

    redash v8 のリポジトリを clone して コンテナを build しようとすると、

    ` FATAL ERROR: Ineffective mark-compacts near heap limit Allocation failed – JavaScript heap out of memory `

    というエラーになった。

    FATAL ERROR: Ineffective mark-compacts near heap limit Allocation failed - JavaScript heap out of memory
    
    Writing Node.js report to file: report.20200305.111353.33.0.001.json
    Node.js report completed
     1: 0x9dab70 node::Abort() [node]
     2: 0x9dbd26 node::OnFatalError(char const*, char const*) [node]
     3: 0xb3b18e v8::Utils::ReportOOMFailure(v8::internal::Isolate*, char const*, bool) [node]
     4: 0xb3b509 v8::internal::V8::FatalProcessOutOfMemory(v8::internal::Isolate*, char const*, bool) [node]
     5: 0xce68a5  [node]
     6: 0xce6f36 v8::internal::Heap::RecomputeLimits(v8::internal::GarbageCollector) [node]
     7: 0xcf2dca v8::internal::Heap::PerformGarbageCollection(v8::internal::GarbageCollector, v8::GCCallbackFlags) [node]
     8: 0xcf3cd5 v8::internal::Heap::CollectGarbage(v8::internal::AllocationSpace, v8::internal::GarbageCollectionReason, v8::GCCallbackFlags) [node]
     9: 0xcf66e8 v8::internal::Heap::AllocateRawWithRetryOrFail(int, v8::internal::AllocationType, v8::internal::AllocationAlignment) [node]
    10: 0xcbd017 v8::internal::Factory::NewFillerObject(int, bool, v8::internal::AllocationType) [node]
    11: 0xff307b v8::internal::Runtime_AllocateInYoungGeneration(int, unsigned long*, v8::internal::Isolate*) [node]
    12: 0x1376259  [node]
    Aborted (core dumped)
    npm ERR! code ELIFECYCLE
    npm ERR! errno 134
    npm ERR! redash-client@9.0.0-alpha build: `npm run clean && NODE_ENV=production webpack`
    npm ERR! Exit status 134
    npm ERR! 
    npm ERR! Failed at the redash-client@9.0.0-alpha build script.
    npm ERR! This is probably not a problem with npm. There is likely additional logging output above.
    ERROR: Service 'server' failed to build: The command '/bin/sh -c npm run build' returned a non-zero code: 134

    原因

    マシンのメモリーが足りない。

    https://redash.io/help/open-source/dev-guide/docker

    v8 のイメージをbuild するには最低限 4G のメモリーが必須となるようだ。

    ビルドするマシンのメモリーを増やすことによって解決できた。


  • ERROR: (gcloud.auth.application-default.print-access-token) The Application Default Credentials are not available.

    ERROR: (gcloud.auth.application-default.print-access-token) The Application Default Credentials are not available.

    はじめに

    gcloud コマンドで key を取得しようとした際、The Application Default Credentials are not available.と出た時の対処法についてまとめます。

    原因と対処

    default のkeyが読み込めていないことが濃厚です。
    対処法としては、環境変数でgcp の key の場所を定義するだけでパスすることができます。

    詳細

    % curl -X POST \
    -H "Authorization: Bearer "$(gcloud auth application-default print-access-token) \
    -H "Content-Type: application/json; charset=utf-8" \
    -d @request.json \
    https://translation.googleapis.com/language/translate/v2
    ERROR: (gcloud.auth.application-default.print-access-token) The Application Default Credentials are not available. They are available if running in Google Compute Engine. Otherwise, the environment variable GOOGLE_APPLICATION_CREDENTIALS must be defined pointing to a file defining the credentials. See https://developers.google.com/accounts/docs/application-default-credentials for more information.
    {
      "error": {
        "code": 403,
        "message": "The request is missing a valid API key.",
        "errors": [
          {
            "message": "The request is missing a valid API key.",
            "domain": "global",
            "reason": "forbidden"
          }
        ],
        "status": "PERMISSION_DENIED"
      }
    }

    `gcloud auth application-default print-access-token`  がうまく動いていないようですね。

    gcloud auth application-default print-access-token

    ERROR: (gcloud.auth.application-default.print-access-token) The Application Default Credentials are not available. They are available if running in Google Compute Engine. Otherwise, the environment variable GOOGLE_APPLICATION_CREDENTIALS must be defined pointing to a file defining the credentials. See https://developers.google.com/accounts/docs/application-default-credentials for more information.

    環境変数 `GOOGLE_APPLICATION_CREDENTIALS` に gcp の key を登録します。

    export GOOGLE_APPLICATION_CREDENTIALS=~/.ssh/gcp.json

     再度 `gcloud auth application-default print-access-token` を叩くとtoken を取得することができます。


  • redash API で パラメータを動的に変えてクエリを受け付ける

    redash API で パラメータを動的に変えてクエリを受け付ける

    tl;dr;

    redash API で パラメータを動的に変えてクエリを受け付ける方法を紹介します。

    サードパーティを使わず行います。今回の version は redash v6ですがおそらくそれ以降でも可能かと思います。

    手順をご紹介する前の前提条件

    私の環境では検証環境としてすぐ起動できる redash の環境を利用します。

    # git clone
    git clone https://github.com/GitSumito/redash-blue.git
    cd redash-blue
    
    # DB 初期化
    docker-compose run --rm server create_db docker-compose up
    
    # 起動
    docker-compose up -d  

    http://127.0.0.1/ へ接続し、データソースの設定などを適宜行います。

    DBのcredential 情報などは下記をご覧ください。

    https://github.com/GitSumito/redash-blue/blob/master/README.md


    動的クエリを作成する

    その後、 Create -> Query に移動し、変数を受け付けるカラムを書きます。

    この場合はクエリを code という引数で受け取ります。

     code に JPN といれると、redash が where ContryCode = "JPN"と組み立ててくれる仕組みです。

    これをブラウザからではなく、RestFull API で行うようにするというのが今回の趣旨です。

    作成した Query は publish してください、

    事前準備

    ユーザーのAPI keyを確認します。

    http://127.0.0.1/users/1

    を開けばAPI keyを確認することができます。

    このAPI keyを確認します。

    ジョブを登録する

    引数は p_xxxx というパラメータ名で受け付けるようです。
    code という引数を設定したので、今回は p_code というパラメータ名になりました。

    これを POST で送ります。curl コマンドで行うとやりやすいかと思います。

    curl --request POST \
    --url 'http://127.0.0.1/api/queries/1/refresh?p_code=IND' \
    --header 'Authorization: Key ajxxxxxxxxxxxxxxx'

    受け付けられると、 以下のようなレスポンスが返ってきます。

    ID を控えてください。今回登録したジョブを、以下のIDを用いて確認することができます。

    query_result_id を確認する

    ジョブのIDをパスパラメータとして渡します。

    また、api_keyを後ろにつけてください。

    curl "http://127.0.0.1/api/jobs/93452aa6-8569-43fc-b816-cb441ce80e03?api_key=ajxxxxxxxxxxxxxxx"

    query_result_id が返ってきます。こちらを用いて結果を確認します。

    query_result_id を用いて結果を確認する


    curl -s -H 'Authorization:Key ajxxxxxxxxxxxxxxx' -H 'Accept:application/json' -H 'Content-Type:application/json' http://127.0.0.1/api/query_results/8
    

    以下の通り、ContryCode `IND`の情報を取得することができました。

    今回の version は redash v6ですがおそらくそれ以降でも可能かと思います。

  • ECS Scheduling tasks の FailedInvocations を対処する

    ECS Scheduling tasks の FailedInvocations を対処する

    tl;dr;

    ECS のタスクスケジューリングで

    FailedInvocations が発生するのは、CloudWatch eventsでの実行ロールに権限が足りないから。その対処方法をまとめる。

    IAM ロール

    I AM ロールを作成する。

    今回は ecsEventsRole という名前にした。

    作成したロールの信頼関係を編集。

    cloudwatch events から実行できるよう権限を付与。

    {
      "Version": "2012-10-17",
      "Statement": [
        {
          "Sid": "",
          "Effect": "Allow",
          "Principal": {
            "Service": "events.amazonaws.com"
          },
          "Action": "sts:AssumeRole"
        }
      ]
    }

    以下の通り貼り付ける。

    作成したroleに`AmazonEC2ContainerServiceEventsRole` ポリシーをアタッチする。

    ECS task scheduleで作成したロールをアタッチ

    今回作成した ecsEventsRole を割り当てる。

    動作確認

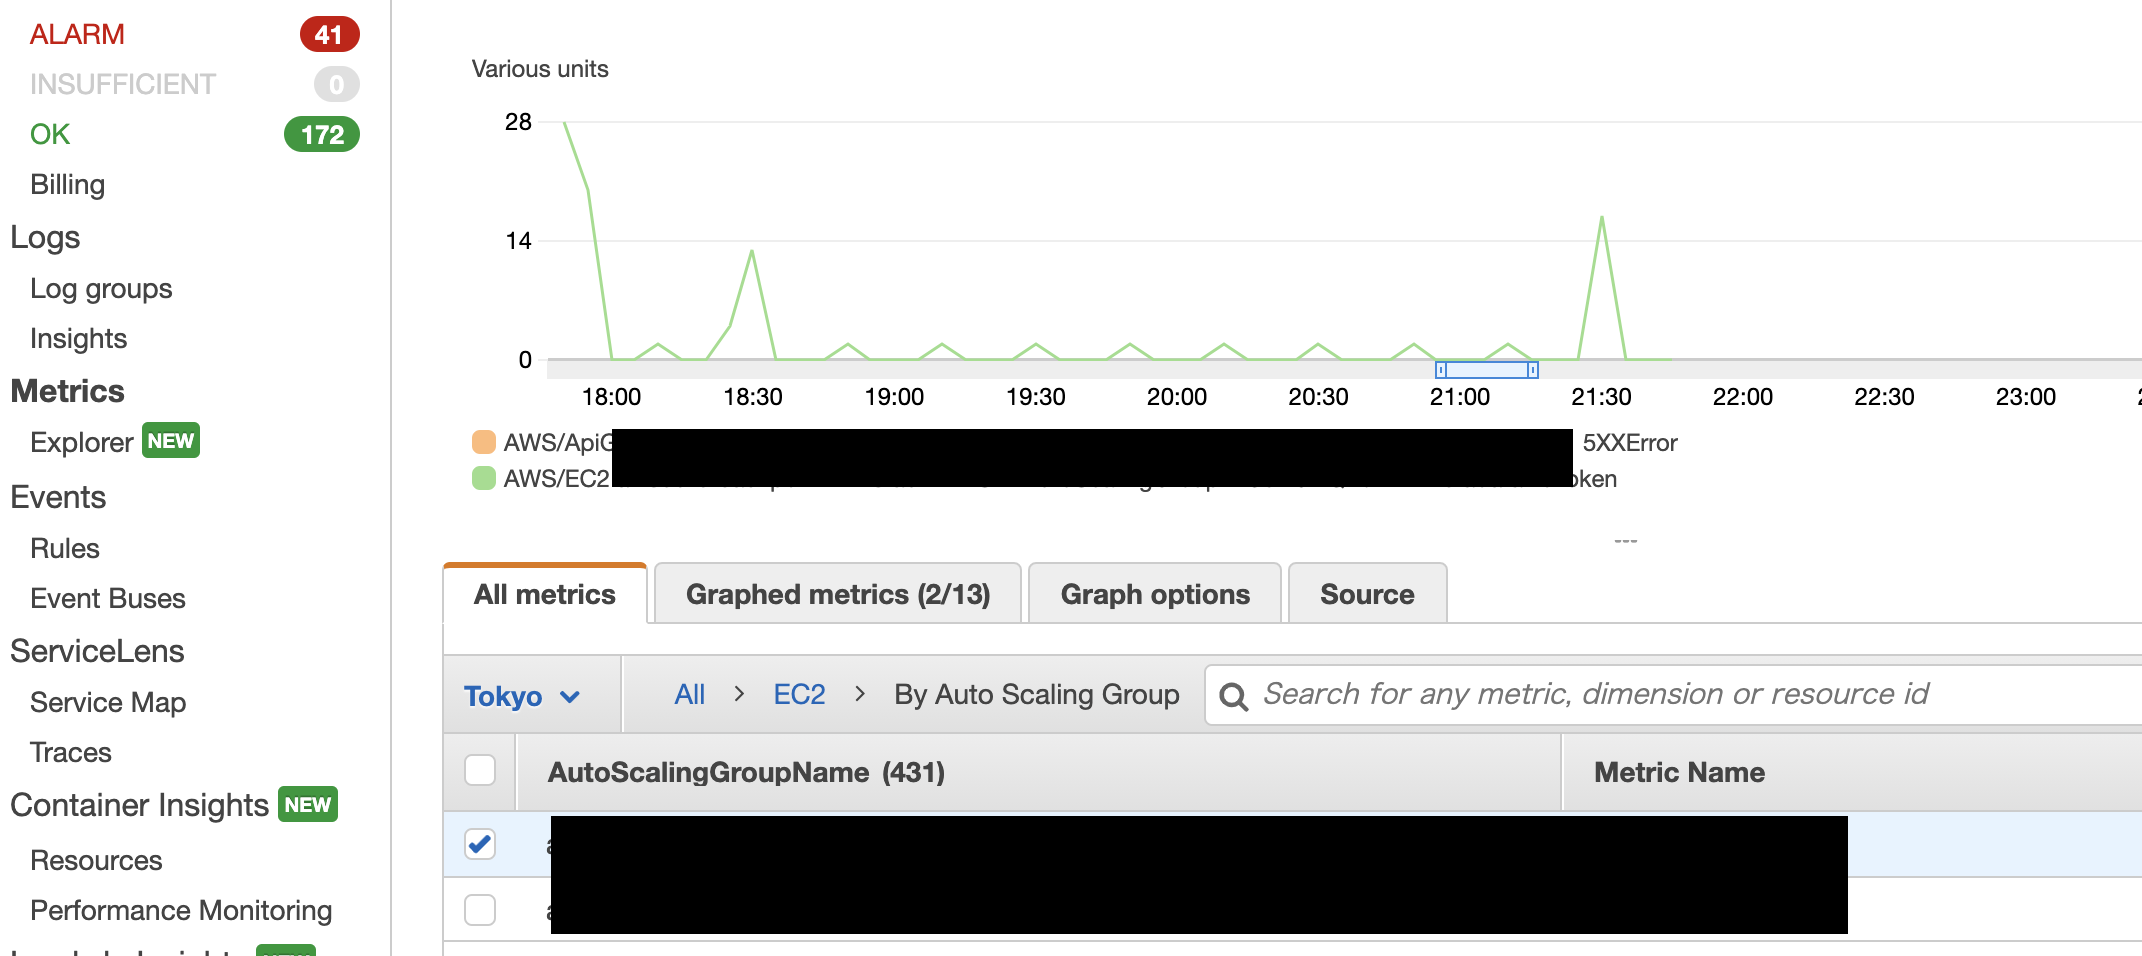
    CloudWatch メトリクスを確認すると、

    FailedInvocations が解消し Invocations になった。