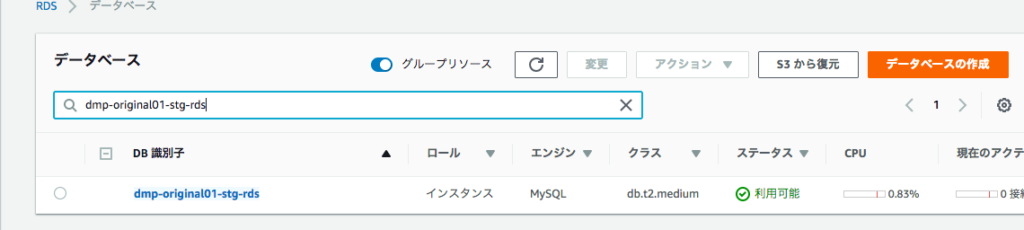
はじめに
RDSをaws cliで削除したいことがある。認証さえ登録されていれば1行でできる。
コマンド
普通にdatabaseが消えるので要注意。
aws rds delete-db-instance --db-instance-identifier [インスタンス名] --skip-final-snapshot
RDSをaws cliで削除したいことがある。認証さえ登録されていれば1行でできる。
普通にdatabaseが消えるので要注意。
aws rds delete-db-instance --db-instance-identifier [インスタンス名] --skip-final-snapshot
vimでフォーマット(インデント)を自動で整えたい時があるので、その方法を紹介。
gg=G
gg でファイルの先頭に移動
= がインデント修正
G で最後まで実施する
という意味になる
route 53の登録をコマンドで実行したい時がある。
コマンドをまとめる。
jsonファイルを作成
{ "Changes": [ { "Action": "UPSERT", "ResourceRecordSet": { "Name": "server-original.stg.rds.sumito.jp", "TTL": 300, "Type": "CNAME", "ResourceRecords": [ { "Value": "server-original-stg-rds.aaaddcda.ap-northeast-1.rds.amazonaws.com" } ] } } ] }
#変数登録 DB_JSON=create_db.json HOST_ZONE_ID=`aws --profile staging route53 list-hosted-zones | jq -r '.[][] | select (.Name == "stg.rds.sumito.jp.") | .Id'` SDBM_ID=`aws --profile staging route53 change-resource-record-sets --hosted-zone-id ${HOST_ZONE_ID} --change-batch file://${DB_JSON} `
echo $SDBM_ID | jq -r '.ChangeInfo.Status' PENDING
マルチクラウド時代、監視はVPCごとに作らなければならなくなりがち。そのため、マルチクラウドに対応した監視を導入すべく、datadogが候補に上がった。
Google Stackdriver,New Relicとも比較した。
integrationを自社開発している。
eventの取得頻度は10分/1回、RDSはもっと頻繁、かたや課金は4時間ごとにみている。agentを入れると15sごとになる。
agentいれても、cloudwatchでも。2018年末時点では1台でxxxx円という料金形態。
リソースの保存は15ヶ月。
ログは料金に応じて。S3に出力して、athenaなどで解析も可能
OS毎にテンプレートを作って、それを自動で割り当てることはできない。
複数同じ設定をする際は、terraformでimport & exportが必要
https://www.terraform.io/docs/providers/datadog/index.html
GCPの場合、プロジェクト毎にdatadog用のService account keyを作らなければならない。
「ある画面をAさんには見せ、Bさんには見せない。」というような制御はできない。
サポートに連絡することで可能
SSL期限の監視などはできない。
APMの設定が楽、agentいれてトレーサー知れるだけでよい。
ニューレリックはコミュニティーベースのサポートになる
agentがオープンソースではないので、トラブルシュートが難しい。
logやAPMを統合させようとするとニューレリックインサイトというのを買わないといけない。
監視の設定がやや複雑。
BigQueryとの連携が強い(Googleなので)
cloudwatch同様の使い方
2018年9月くらいから料金が高くなった
mysqlのuser登録でhostを制限したいということはよくある。
その際よく使うワイルドカードは%(パーセント)だ。
しかし、うっかり/(スラッシュ)16のようにネットワークアドレスをそのまま入れてしまった際の対処を紹介。
思いっきり/16で登録してしまった
+-----------------+----------------+ | user | host | +-----------------+----------------+ | root | % | | sample | 172.40.0.0/16 | +-----------------+----------------+
あるべき姿はこちら
+-----------------+----------------+ | user | host | +-----------------+----------------+ | root | % | | sample | 172.40.% | +-----------------+----------------+
普通に消そうとおもったら、
“` ERROR 1396 (HY000): Operation DROP USER failed for “`
というエラーになってしまった。
mysql> DROP USER ‘sample’@"172.40.0.0/16"; ERROR 1396 (HY000): Operation DROP USER failed for '‘sample’'@'172.40.0.0/16'
バッククォートで囲んでコマンドを実行する
mysql> DROP USER `sample`@`172.40.0.0/16`; Query OK, 0 rows affected (0.00 sec)
地味にハマるので注意。
sftpサーバを立てる手順を明記する。
権限まわりがシビアなのでハマるのできちんと整理する
ftpuserというユーザーを作り、uploadというディレクトリに対してファイルを置く設定とする。
usermod -aG sftp ftpuser ls -l/home/ftpuser/upload/ chmod 750 /home/ftpuser/upload sshd -t service sshd reload vi /etc/ssh/sshd_config
sshd_configは以下の通り
HostKey /etc/ssh/ssh_host_rsa_key HostKey /etc/ssh/ssh_host_ecdsa_key HostKey /etc/ssh/ssh_host_ed25519_key SyslogFacility AUTHPRIV PermitRootLogin no PubkeyAuthentication yes AuthorizedKeysFile .ssh/authorized_keys PasswordAuthentication no ChallengeResponseAuthentication no UsePAM yes X11Forwarding yes PrintLastLog yes UsePrivilegeSeparation sandbox AcceptEnv LANG LC_CTYPE LC_NUMERIC LC_TIME LC_COLLATE LC_MONETARY LC_MESSAGES AcceptEnv LC_PAPER LC_NAME LC_ADDRESS LC_TELEPHONE LC_MEASUREMENT AcceptEnv LC_IDENTIFICATION LC_ALL LANGUAGE AcceptEnv XMODIFIERS Subsystem sftp internal-sftp Match group sftp #ChrootDirectory /home/ftpuser/upload ChrootDirectory /home/ftpuser ForceCommand internal-sftp
# ls -ld /home/ftpuser/ drwxr-xr-x 4 root root 4096 May 29 15:29 /home/ftpuser/ # ls -ld /home/ftpuser/upload/ drwxr-x--- 2 ftpuser ftpuser 4096 May 29 16:00 /home/ftpuser/upload/
上記権限になっていないと、以下のような権限エラーになることがある
Permission denied (publickey).
This service allows sftp connections only.
/var/log/secureには以下のような記載がある
fatal: bad ownership or modes for chroot directory "/home/ftpuser" [postauth] pam_unix(sshd:session): session closed for user ftpuser
Comment Edit yum install vsftpd -y cp /etc/vsftpd/vsftpd.conf /etc/vsftpd/vsftpd.conf.org Elastic_IP=`curl http://169.254.169.254/latest/meta-data/public-ipv4` cat << EOF >> /etc/vsftpd/vsftpd.conf pasv_enable=YES pasv_addr_resolve=YES pasv_address=${Elastic_IP} pasv_min_port=60001 pasv_max_port=60010 use_localtime=YES force_dot_files=YES EOF sed -i -e "/^anonymous_enable/s/YES/NO/g" /etc/vsftpd/vsftpd.conf sed -i -e "/^dirmessage_enable/s/YES/NO/g" /etc/vsftpd/vsftpd.conf sed -i -e "/^#ascii_upload_enable/s/#//g" /etc/vsftpd/vsftpd.conf sed -i -e "/^#ascii_download_enable/s/#//g" /etc/vsftpd/vsftpd.conf sed -i -e "/^#chroot_local_user/s/#//g" /etc/vsftpd/vsftpd.conf sed -i -e "/^#chroot_list_enable/s/#//g" /etc/vsftpd/vsftpd.conf sed -i -e "/^tcp_wrappers/s/YES/NO/g" /etc/vsftpd/vsftpd.conf sed -i -e "/^connect_from_port_20/s/YES/NO/g" /etc/vsftpd/vsftpd.conf sed -i -e "/^xferlog_std_format/s/YES/NO/g" /etc/vsftpd/vsftpd.conf echo "user_config_dir=/etc/vsftpd/user_conf" >> /etc/vsftpd/vsftpd.conf echo "ftpuser" > /etc/vsftpd/chroot_list service vsftpd start chkconfig vsftpd on sudo su useradd ftpuser passwd ftpuser
上記手順をコピペで。
fargateは環境変数を受け付けることができるので、それによって振る舞いを変えることができる。しかし、dockerの場合はどうやって環境変数を渡すの?
“`docker exec“` コマンドは “`-e “` オプションがある。
docker exec -it -e PARAM=123 docker_http /tmp/execute.sh
これでPARAM=123をコンテナ内部に入れてあげる事が可能だ。
Dockerコンテナで実行するシェルは
#!/usr/bin/env bash
を宣言するとよい。
ここからは基本的なシェルだが
PARAM=${PARAM:=99999999}
と記載して置けば、環境変数が設定されていない場合、自動で99999999が代入される。
参考情報=> https://qiita.com/tdrk/items/cc2995fd74e659ea948f
オライリー本より読みやすく、Dockerについて体系的に学ぶことができるのでおすすめ。
![]() |
goを弄る際、必ずと言っていいほど毎回調べている気がするので整理する。
package main import "fmt" func one(x *int) { *x = 1 } func main() { var n int = 100 one(&n) fmt.Println(n) fmt.Println(&n) }
1 0xc420084008
function oneはintのアドレスを引数に受け付ける
“` * “` はポインタ型の箱として理解する
fmt.Println(*n) とした場合、箱の中身。
上記例でいうと100が表示される。
“` & “` はアドレスとして理解する。上記例でいうと0xc420084008とかになる。
mysqlはオフィシャルのdocker imageを提供しているが、実はこれがいろいろ便利だったりするので紹介。
https://hub.docker.com/_/mysql/
Initializing a fresh instance
When a container is started for the first time, a new database with the specified name will be created and initialized with the provided configuration variables. Furthermore, it will execute files with extensions .sh, .sql and .sql.gz that are found in /docker-entrypoint-initdb.d. Files will be executed in alphabetical order. You can easily populate your mysql services by mounting a SQL dump into that directory and provide custom images with contributed data. SQL files will be imported by default to the database specified by the MYSQL_DATABASE variable.
/docker-entrypoint-initdb.dへ.sh, .sql and .sql.gzファイルを置けば、アルファベット順に読まれる。SQLファイルはimportされる。
何も考えず置けばよいらしいのだ。Dockerfileにいろいろ書かないで済むようなのである。
昔MySQLはサンプルデータを公開していると書いたし、せっかくなので、そのデータをつかう。 https://qiita.com/S-T/items/923cf689ee5f44525457
http://downloads.mysql.com/docs/world.sql.gz
をダウンロードすることにする
MySQL 5.7のオリジナルイメージを持ってきて、
先ほどダウンロードしたsql.gzファイルを/docker-entrypoint-initdb.dにコピー。
FROM mysql:5.7 COPY world.sql.gz /docker-entrypoint-initdb.d/world.sql.gz
これだけ。
# docker build ./ -t mysql-sampledata Sending build context to Docker daemon 94.72kB Step 1/2 : FROM mysql:5.7 ---> 141eda20897f Step 2/2 : COPY world.sql.gz /docker-entrypoint-initdb.d/world.sql.gz ---> 9776c5f28986 Removing intermediate container f8fa93b7eb40 Successfully built 9776c5f28986 Successfully tagged mysql-sampledata:latest
無事docker imageが出来上がった
# docker images REPOSITORY TAG IMAGE ID CREATED SIZE mysql-sampledata latest 9776c5f28986 15 seconds ago 372MB mysql 5.7 141eda20897f 9 days ago 372MB
このmysql-sampledataを起動させる。
docker run -e MYSQL_ALLOW_EMPTY_PASSWORD=yes -d mysql-sampledata
MYSQL_ALLOW_EMPTY_PASSWORDオプションでパスワード無しでログインできるようになる。
https://hub.docker.com/_/mysql/
MYSQL_ALLOW_EMPTY_PASSWORD
This is an optional variable. Set to yes to allow the container to be started with a blank password for the root user. NOTE: Setting this variable to yes is not recommended unless you really know what you are doing, since this will leave your MySQL instance completely unprotected, allowing anyone to gain complete superuser access.
パスワードを付与したい場合は以下のオプションを利用する
“` -e MYSQL_ROOT_PASSWORD=mysql “`
docker exec -it $(docker container ls | grep 'mysql-sampledata' | awk '{print $1}') /bin/sh
パスワードなしでmysqlの中に入れる
# mysql -uroot -p Enter password:
show databases;を行うと、先ほどimportしたworldというデータベースが見える
mysql> show databases; +--------------------+ | Database | +--------------------+ | information_schema | | mysql | | performance_schema | | sys | | world | +--------------------+ 5 rows in set (0.00 sec) mysql>
もちろん中身もある
mysql> use world; Reading table information for completion of table and column names You can turn off this feature to get a quicker startup with -A mysql> show tables; +-----------------+ | Tables_in_world | +-----------------+ | city | | country | | countrylanguage | +-----------------+ 3 rows in set (0.00 sec) mysql>
mysqldumpの結果を入れることもできるし、いろいろ使えそうだ。
ポートを付与する。
# passwordあり docker run --name mysql -e MYSQL_ROOT_PASSWORD=mysql -d -p 3306:3306 mysql-sampledata # passwordなし docker run --name mysql -e MYSQL_ALLOW_EMPTY_PASSWORD=yes -d -p 3306:3306 mysql-sampledata
mysql -uroot -h127.0.0.1 -pmysql
gitにpushできなくなったというトラブルの対処
# git push origin abc To git@git.xxx.com:oooo/xxxx-ooo.git ! [rejected] xxx -> xxx (non-fast-forward) error: failed to push some refs to 'git@git.xxx.com:oooo/xxxx-ooo.git' hint: Updates were rejected because the tip of your current branch is behind hint: its remote counterpart. Merge the remote changes (e.g. 'git pull') hint: before pushing again. hint: See the 'Note about fast-forwards' in 'git push --help' for details.
というエラーが発生。
リモートリポジトリと、ローカルリポジトリに差分があることにより発生する。
git push origin :branch git push origin branch
remoteブランチを削除することになる。