はじめに
Firebase Authentication は、firebase での認証処理を行うための機能です。
ID/PWによるパスワード認証、電話番号認証、Google、Facebook、Twitterなどソーシャルアカウントを使用した認証を行うことができます。
本記事はfirebase authenticationでユーザーのimport/exportについて調べました。
firebase authenticationの責務について
責務としては認証までです。
認可については本機能のスコープ外になります。
詳細は以下参考
https://apps-gcp.com/firebase-authentication/
コンソール画面での見え方について
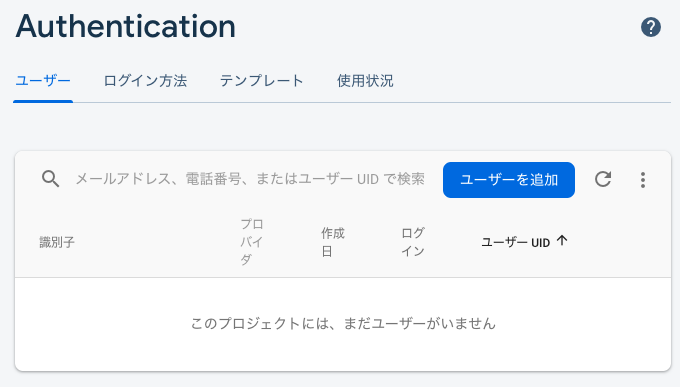
コンソール画面にcsv/json形式でimportする機能があっても良さそうですが、残念ながらそのボタンは見当たりません。

青い「ユーザーを追加」ボタンを押しても、メールアドレスとパスワードを入力する画面が表示されるのみです。
対応
firebase cliを使うことで、具体的には “` firebase auth:import “` コマンドを使うことでimportが可能ということが分かりました。
https://firebase.google.com/docs/cli/auth-import#syntax
firebase cliのinstall方法はこちら
https://firebase.google.com/docs/cli?hl=ja
jsonファイルを作成する
試しにtwitter認証アカウントを2つ、Google認証というアカウントを1つ。合計3ユーザーを作成することにします。
{
  "users": [
    {
      "localId": "1",
      "email": "ec@sumito.jp",
      "emailVerified": null,
      "passwordHash": null,
      "salt": null,
      "displayName": "test1",
      "photoUrl": null,
      "providerUserInfo": [
        {
          "providerId": "twitter.com",
          "rawId": "xxxxxxxxxxxx",
          "email":  null,
          "displayName": "test1",
          "photoUrl": null
        }
      ]
    },
    {
      "localId": "2",
      "email": "sute@sumito.jp",
      "emailVerified": null,
      "passwordHash": null,
      "salt": null,
      "displayName": "test2",
      "photoUrl": null,
      "providerUserInfo": [
        {
          "providerId": "twitter.com",
          "rawId": "xxxxxxxxxxxx",
          "email":  null,
          "displayName": "test2",
          "photoUrl": null
        }
      ]
    },
    {
      "localId": "3",
      "email": "mitsuisumito.viva@gmail.com",
      "emailVerified": true,
      "displayName": "sumito tsukada",
      "photoUrl": "https://lh3.googleusercontent.com/a-/xxx,
      "providerUserInfo": [
        {
          "providerId": "google.com",
          "rawId": "1234",
          "email": "mitsuisumito.viva@gmail.com",
          "displayName": "sumito tsukada",
          "photoUrl": "https://lh3.googleusercontent.com/a-/xxx"
        }
      ]
    }
  ]
}
今回はuser.jsonという名前で保存し、読み込ませます。
$ firebase auth:import ./user.json --hash-algo=HMAC_SHA256  --hash-key=hogehoge
Processing ./user.json (1451 bytes)
Starting importing 3 account(s).
✔  Imported successfully.
今回はハッシュアルゴリズムをHMAC_SHA256にしましたが、適宜変更してください。
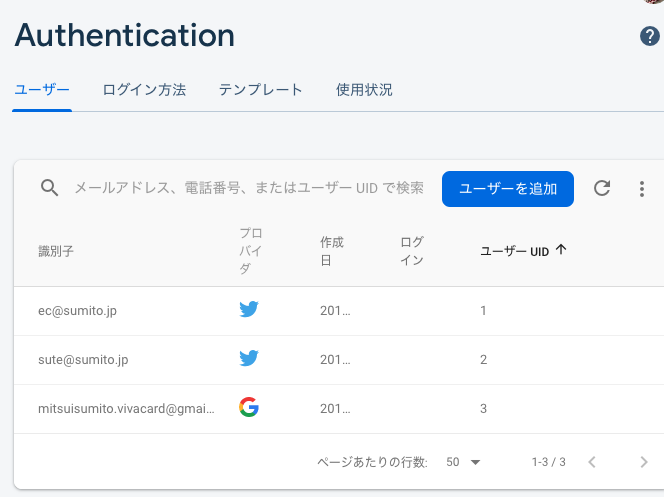
firebase authentication上でimport確認
無事importされたようです。

ちなみに、デフォルトでFirebase authenticationを使いアカウント作成すると、ユーザーUIDはランダム数字になりますが、import形式では任意のIDを指定することができるようです。
動作確認
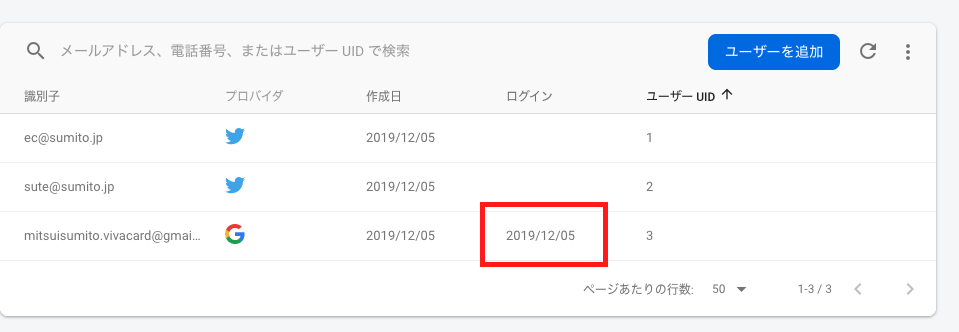
自作のアプリケーションのログイン画面からログインを試みます。

無事ログインできたようです。

無事ログイン日時も記載されました

export
firebase authenticationに登録されたユーザーは“` firebase auth:export “` コマンドでexportすることができます
$ firebase auth:export hogehoge --format=json
Exporting accounts to hogehoge
✔  Exported 3 account(s) successfully.
所感
firebase authenticationを使えば既存システムからの移行も現実的に見えるかもしれません。
とはいえ、まだまだ調査すべきところは山のようにあるので、一つ一つ調べていこうと思います。

