月: 2019年6月

  • 【Docker】ストレージ容量不足時の対処法【解決済み】

    【Docker】ストレージ容量不足時の対処法【解決済み】

    はじめに

    Dockerのビルドサーバーでストレージ不足が発生しました。
    不要なファイルを削除する必要があるため、安全に容量を確保する方法を紹介します。
    dockerで/var/lib/docker/overlay2 が肥大化した時の対処になります。

    まず対応すべきこと

    現状把握

    Dockerがディスク容量を圧迫している原因を確認するため、以下のコマンドを使用します。

    docker system df このコマンドで、Dockerに関連するディスク使用状況を確認できます。

    TYPE TOTAL ACTIVE SIZE RECLAIMABLE
    Images 9 1 2.014GB 1.962GB (97%)
    Containers 2 0 0B 0B
    Local Volumes 4 2 824.6MB 781.2MB (94%)
    Build Cache 0 0 0B 0B
    対処

    使用されていないコンテナ、ボリューム、ネットワーク、イメージを削除するには、以下のコマンドを使用します。

    docker system prune

    ただし、使用されていないボリュームとイメージを削除するには、以下のオプションが必要です。
    docker system prune --volumes --all

    volumesの削除

    上記コマンドで、不要なvolumesを削除しました。この操作で、355.4MBの容量を確保できます。ただし、storageの削除には、–volumesオプションを追加する必要があります。

    53d15cd6b78ad0f21788a22e9ce16a7295c4bab97609973
    deleted: sha256:7ae9338aed73a0f33568db53740431038d3a1f779c4dae40d27433984e1cd97c
    deleted: sha256:b1be54c8cadff1e50b87b93559320a1ae57b8d0dd326507148f7ca81d707beed
    deleted: sha256:86d78f10b9718618eaae056f5dfa1edae518949aee4578e4147268e9db2e75f0

    Total reclaimed space: 355.4MB
    ただし、storageの削除には、 --volumes オプションを追加する必要があります。

    imagesの削除

    docker system prune --all

    作業後

    上記の操作を完了した後、Dockerのディスク使用状況を再度確認すると、すべてのカテゴリーで容量が0になります。

  • ワンライナーでサイトのレスポンス速度を計測する

    ワンライナーでサイトのレスポンス速度を計測する

    はじめに

    しっかりした監視ツールを導入せずに、さくっとレスポンス速度を可視化したいときがある。

    手軽に描写できるワンライナーを紹介。

    どんなことができるか

    ワンライナー

    while true; do sleep 1; curl -kL 'http://接続先URL' -o /dev/null -w "%{time_total}" 2> /dev/null | perl -anle 'print "▇"x($F[0]*100)." $F[0]"' ;done
    

    [ec2-user@ip-10-1-8-134 ~]$ while true; do sleep 1; curl -kL 'https://tsukada.sumito.jp' -o /dev/null -w "%{time_total}" 2> /dev/null | perl -anle 'print "▇"x($F[0]*100)." $F[0]"' ;done
    ▇▇▇▇▇▇▇▇▇▇▇▇▇▇▇▇▇▇▇▇▇▇▇▇▇▇▇▇▇▇▇▇▇▇▇▇ 0.361941
    ▇▇▇▇▇▇▇▇▇▇▇▇▇▇▇▇▇▇▇▇▇▇▇▇▇▇▇▇▇▇▇▇▇▇▇▇▇ 0.370393
    ▇▇▇▇▇▇▇▇▇▇▇▇▇▇▇▇▇▇▇▇▇▇▇▇▇▇▇▇▇▇▇▇▇▇▇▇▇▇▇▇▇▇▇▇▇▇▇▇▇▇▇▇▇▇▇▇▇▇▇▇▇▇▇▇▇▇▇▇▇▇▇▇▇▇▇▇▇▇▇▇▇▇▇▇▇▇▇▇▇▇ 0.904969

    状況に応じて

    “` *100 “` の部分を適宜変更する。


  • standard_init_linux.go:190: exec user process caused “exec format error”

    standard_init_linux.go:190: exec user process caused “exec format error”

    概要

    dockerで起動シェルを渡した際、 “` standard_init_linux.go:190: exec user process caused “exec format error” “` というエラーが発生した際の対処

    原因

    起動シェルの中でshebangが抜けていたことが原因

    dockerの起動スクリプトでは必ず指定しなければならない

    対処

    起動シェルの1行目に

    #!/bin/bash

    を追加してあげるのみ(環境によって適宜変える)

    そもそもshebangとは

    “`  #! “` で始まる行。

    実行プログラムのインタプリタが定義される。

    ほとんどのプログラムは shebang が自動補完されるため無くても動く。しかし、dockerでは省略が不可能。shebangが必要なようだ。


  • let’s encrypt に登録したメールアドレスを変更する

    let’s encrypt に登録したメールアドレスを変更する

    はじめに

    let’s encrypt にメールアドレスを登録すると、証明書の有効期限が近くなると通知してくれる機能がある。その通知先を変更する方法を紹介。

    手順

    “` certbot-auto “` を利用することで簡単に変更が可能だ。

    詳細は以下の通り

    /usr/local/src/certbot/certbot-auto register --update-registration --email [new Mailaddress]

    結果

    # /usr/local/src/certbot/certbot-auto register --update-registration --email letsencrypt@sumito.jp
    Upgrading certbot-auto 0.34.2 to 0.35.1...
    Replacing certbot-auto...
    Creating virtual environment...
    Installing Python packages...
    Installation succeeded.
    Saving debug log to /var/log/letsencrypt/letsencrypt.log
    Usage 'certbot register --update-registration' is deprecated.
    Please use 'certbot update_account [options]' instead.
    
    
    - - - - - - - - - - - - - - - - - - - - - - - - - - - - - - - - - - - - - - - -
    Would you be willing to share your email address with the Electronic Frontier
    Foundation, a founding partner of the Let's Encrypt project and the non-profit
    organization that develops Certbot? We'd like to send you email about our work
    encrypting the web, EFF news, campaigns, and ways to support digital freedom.
    - - - - - - - - - - - - - - - - - - - - - - - - - - - - - - - - - - - - - - - -
    (Y)es/(N)o: y
    
    IMPORTANT NOTES:
     - Your e-mail address was updated to letsencrypt@sumito.jp


  • watch curl時にダウンロード状況を出さない

    watch curl時にダウンロード状況を出さない

    はじめに

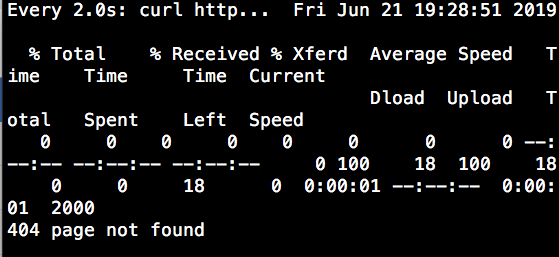
    curlをwatchコマンドでポーリングしたい場合がある。しかし、
    普通に実施すると、ダウンロード進捗状況が表示されてしまう。

    watch curl http://hogehoge.com/version

    % Total % Received % Xferd Average Speed Time Time Time Current
    Dload Upload Total Spent Left Speed
    0 0 0 0 0 0 0 0 --:--:-- --:--:-- --:--:-- 0 100 199 100 199 0 0 199 0 0:00:01 --:--:-- 0:00:01 33166

    対処

    curlには “` -s “` という進捗を表示しないモードがある。

    watch curl -s http://hogehoge.com/version


  • Cannot connect to the Docker daemon at unix:///var/run/docker.sock. Is the docker daemon running?

    Cannot connect to the Docker daemon at unix:///var/run/docker.sock. Is the docker daemon running?

    はじめに

    GitLab CIでDockerのimageをbuildしようとする際、 “` Cannot connect to the Docker daemon at unix:///var/run/docker.sock. Is the docker daemon running? “` というエラーがでた。その対処。

    原因

    Dockerコンテナ内で、Dockerコンテナを立てる事を許可されていないため。

    対策

    GitLab Runnerのサーバの設定を変更する

    “` /etc/gitlab-runner/config.toml “` を以下の通り修正

    変更前

      [runners.docker]
        tls_verify = false
        image = "docker:stable"
        privileged = false
    

    変更後

      [runners.docker]
        tls_verify = false
        image = "docker:stable"
        privileged = true


    特にサービスの再起動など設定は不要。

    再度GitLab CIが走るたびに上記tomlファイルが読み込まれる仕組み。

  • MacOSX のzshでlessコマンド(source-highlight)の色付け

    MacOSX のzshでlessコマンド(source-highlight)の色付け

    はじめに

    lessコマンドは通常、白と黒の画面で表示されるため、vimのように色付けしたいことがある。“` source-highlight “` を使ったlessコマンドで色付けする方法を紹介。

    設定

    install

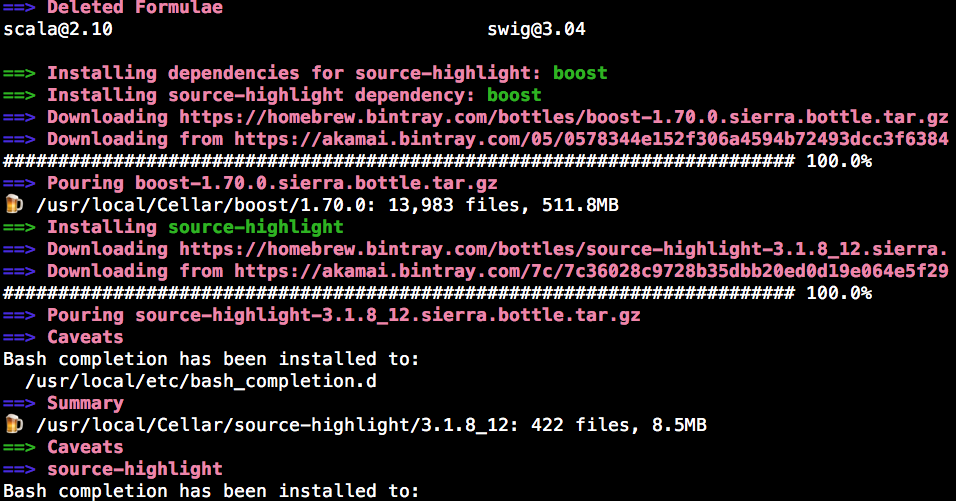
    brew install source-highlight
    

    このような画面が表示されればinstall完了だ。

    環境変数を設定

    ~/.zshrc を編集

    export LESS='-R'
    export LESSOPEN='| /usr/local/bin/src-hilite-lesspipe.sh  %s'

    読み込み

    source ~/.zshrc

    確認

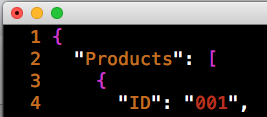
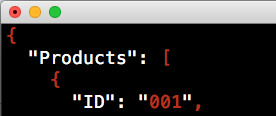
    vimと同じ色付けになるわけではなく、若干の差異は発生する

    vimで開いたjsonファイル

    色付けしたlessで開いたjsonファイル

    vimで開いたymlファイル

    色付けしたlessで開いたymlファイル


    特にymlファイルは対応できていない印象。しかし、shellやjsonは見やすくなる。

  • ディレクトリの中のファイルの文字を一括置換するワンライナー

    ディレクトリの中のファイルの文字を一括置換するワンライナー

    はじめに

    ディレクトリの中のファイルの文字を一括置換したい時がある。一括置換するワンライナーを紹介。

    前提

    変換元: github.com/hogehoge/src
    変換先: git.sumito.com/hogehoge/src

    ワンライナー

    grep -rl github.com/hogehoge/src ./* | xargs perl -i -pe 's#github.com/hogehoge/src#git.sumito.com/hogehoge/src#g'

    注意

    grep の検索文字はエスケープしない。
    sedの区切り文字は / (スラッシュ) で区切ることが一般的だが、他の文字で代用も可能。
    特にディレクトリのような / (スラッシュ) が入る際は、他のものを今回は # (シャープ)を区切り文字とする。

  • User: anonymous is not authorized to perform: execute-api:Invoke on resource: arn:aws:execute-api:

    User: anonymous is not authorized to perform: execute-api:Invoke on resource: arn:aws:execute-api:

    はじめに

    API gatewayのテストをしていると、

    “` User: anonymous is not authorized to perform: execute-api:Invoke on resource: arn:aws:execute-api: “` というエラーが出た。

    原因

    パーミッションエラー

    対処

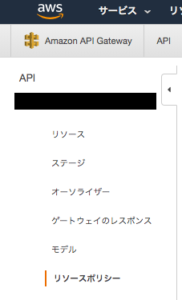
    API gatewayの許可IPを確認する。

    aws:SourceIpにIPを追加する。

    {
        "Version": "2012-10-17",
        "Statement": [
            {
                "Effect": "Allow",
                "Principal": "*",
                "Action": "execute-api:Invoke",
                "Resource": "arn:aws:execute-api:*:*:*/*",
                "Condition": {
                    "IpAddress": {
                        "aws:SourceIp": [
                            "123.0.0.1",
                            "1.23.4.1"
                        ]
                    }
                }
            }
        ]
    }


    参考情報

    クラメソさん、いつもありがとうございます。

    https://dev.classmethod.jp/cloud/aws/api-gateway-resource-policy/


  • 音声から日本語の文字起こしを行う

    音声から日本語の文字起こしを行う

    概要

    日本語の音声ファイルを文字起こししたい場合がある。真っ先に思い浮かんだのがAmazon transcribeだが、まだ日本語には対応していなかった。

    調べたところ、Google Speech APIが日本語に対応していたのでこちらを使って文字起こしをしてみた。

    サンプルの音声

    iPhoneに付属しているボイスメモというアプリで録音した

    https://itunes.apple.com/jp/app/%E3%83%9C%E3%82%A4%E3%82%B9%E3%83%A1%E3%83%A2/id1069512134?mt=8

    今回はあくまでもサンプルなので、今日の日付を読み上げた。


    加工

    ボイスメモで録音したファイルはm4aファイルになる。

    このフォーマットではGoogle Speech APIが対応していないのでwavファイルへ変換する。

    Speech APIが対応しているファイルフォーマットは以下にまとまっている

    https://cloud.google.com/speech-to-text/docs/encoding?hl=ja

    macでは標準で付属しているafconvertというソフトを使う事で手軽に変換できる。

    -d LEI16を指定する事で読み込める形になる。

    afconvert -f WAVE -d LEI16 sample.m4a sample.wav

    GCPの設定

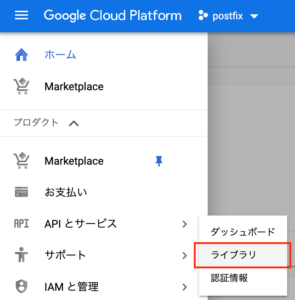
    コンソール画面左上の[ツールとサービス] > [APIとサービス] > [ライブラリ] を選択。


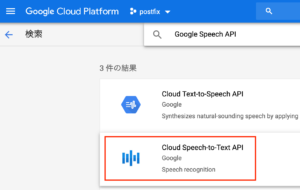
    APIの一覧から[Speech API]を選択し、[有効にする]を押して  を有効にする。

    音声ファイルを格納

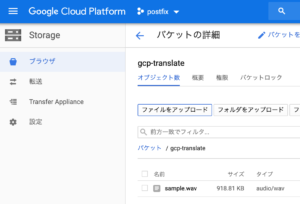
    先ほど変換したwavファイルをCloud Storageに格納する。

    文字起こし

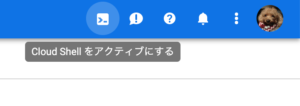
    Cloud Shellをアクティブにする

    ジョブの登録

    $ gcloud ml speech recognize-long-running gs://gcp-translate/sample.wav --language-code='ja-JP' --async
    

    以下のようなレスポンスが来る

    Check operation [441557619774374990] for status.
    {
      "name": "441557619774374990"
    }

    ステータス確認

    $ gcloud ml speech operations describe 441557619774374990

    以下のようなレスポンスが来る

    {
      "name": "441557619774374990",
      "metadata": {
        "@type": "type.googleapis.com/google.cloud.speech.v1.LongRunningRecognizeMetadata",
        "progressPercent": 23,
        "startTime": "2019-06-01T16:39:03.805780Z",
        "lastUpdateTime": "2019-06-01T16:43:43.954310Z"
      }
    }

    この画面で進捗率23%という事がわかる。

    時間をおいて実施すると進捗率は変わる。

    {
      "name": "441557619774374990",
      "metadata": {
        "@type": "type.googleapis.com/google.cloud.speech.v1.LongRunningRecognizeMetadata",
        "progressPercent": 86,
        "startTime": "2019-06-01T16:39:03.805780Z",
        "lastUpdateTime": "2019-06-01T16:52:40.778647Z"
      }
    }


    進捗率が100%になったら、リダイレクトさせてtextに出力。

    gcloud ml speech operations describe 441557619774374990 > test

    ファイルを開き、中身を確認

    cat test
    {
      "done": true,
      "metadata": {
        "@type": "type.googleapis.com/google.cloud.speech.v1.LongRunningRecognizeMetadata",
        "lastUpdateTime": "2019-06-10T14:28:36.384592Z",
        "progressPercent": 100,
        "startTime": "2019-06-10T14:28:32.372249Z"
      },
      "name": "441557619774374990",
      "response": {
        "@type": "type.googleapis.com/google.cloud.speech.v1.LongRunningRecognizeResponse",
        "results": [
          {
            "alternatives": [
              {
                "confidence": 0.9525875,
                "transcript": "\u4eca\u65e5\u306f2019\u5e746\u670811\u65e5\u3067\u3059"
              }
            ]
          }
        ]
      }
    }

    ファイルを開いた際、descriptionがエンコードされていなかったら適宜エンコードする必要がある。

    最も手軽なのは、jqコマンドに渡す事で読めるフォーマットになる

    $ cat test | jq -r '.'
    {
      "done": true,
      "metadata": {
        "@type": "type.googleapis.com/google.cloud.speech.v1.LongRunningRecognizeMetadata",
        "lastUpdateTime": "2019-06-10T14:28:36.384592Z",
        "progressPercent": 100,
        "startTime": "2019-06-10T14:28:32.372249Z"
      },
      "name": "441557619774374990",
      "response": {
        "@type": "type.googleapis.com/google.cloud.speech.v1.LongRunningRecognizeResponse",
        "results": [
          {
            "alternatives": [
              {
                "confidence": 0.9525875,
                "transcript": "今日は2019年6月11日です"
              }
            ]
          }
        ]
      }
    }


    今日は2019年6月11日です

    という音声が無事取れた。

    音声が綺麗に拾えていれば、これを使って文字起こしをする事ができそうだ。