はじめに
Laravelでは、決められた変数名が、ルートセグメント名と一致するルートと、コントローラーアクションで定義されたEloquentモデルを自動的に紐付けるようだ。
便利なんだろうけど、少し難しいので整理する。
具体的な動き
Route::get('api/users/{user}', function (App\User $user) {
    return $user->email;
});
この場合、$user変数は“` App\User “` モデルとしてタイプされ、変数名は“` {user}“` URLセグメントと一致するため、LarvelはリクエストURIの対応する値と、一致するIDをもつモデルインスタンスを自動的に挿入する。
一致するモデルインスタンスが見つからない場合は、404 status codeを返却する。
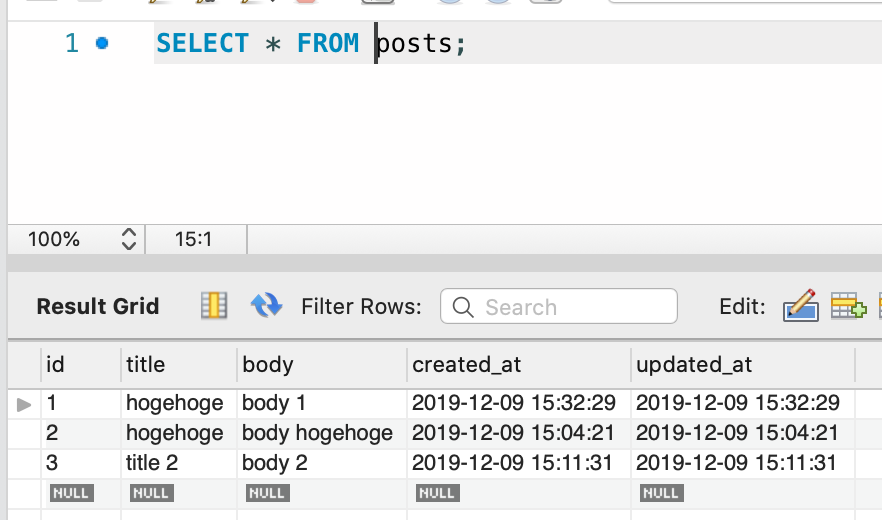
サンプルコード
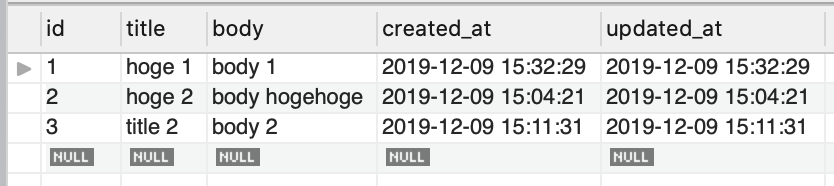
database
router
<?php

Route::get('/', 'PostsController@index');

// 通常の書き方
//Route::get('/posts/{id}','PostsController@show');

// Implicit Bindingを使った書き方
Route::get('/posts/{post}', 'PostsController@show');
Controller
<?php
namespace App\Http\Controllers;
use App\Post;
class PostsController extends Controller
{
public function index(){
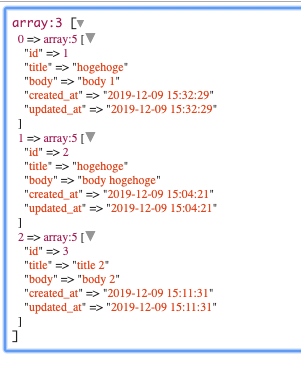
$posts = Post::all();
return view('posts.index')->with('senddata', $posts);
}
// 通常の書き方
// public function show($id){
// $posts = Post::findOrFail($id);
// return view('posts.show')->with('posts', $posts);
// }\
// Implicit Bindingを使った書き方
public function show(Post $post){
return view('posts.show')->with('posts', $post);
}
}
blade file
<!DOCUMENT html>
<html lang="ja">
<head>
<meta charset="utf-8">
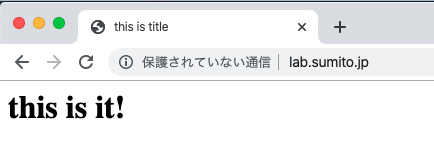
<title>this is title</title>
<link rel="stylesheet" href="/css/style.css">
</head>
<body>
<div class='container'>
<h1> {{ $posts->title}} </h1>
<p>{!! nl2br(e($posts->body)) !!} </p>
</dev>
</body>
</html>
<!DOCUMENT html>
<html lang="ja">
<head>
<meta charset="utf-8">
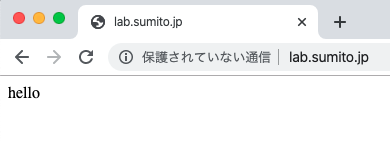
<title>this is title</title>
<link rel="stylesheet" href="/css/style.css">
</head>
<body>
<div class='container'>
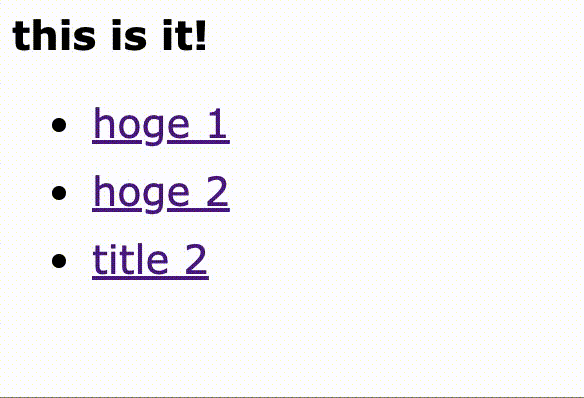
<h1> this is it!</h1>
<ul>
@forelse ($senddata as $data)
<!--通常の書き方
<li> <a href="{{ action('PostsController@show', $data->id) }} "> {{ $data->title }} </a></li>
-->
<!--Implicit Bindingを使った書き方-->
<li> <a href="{{ action('PostsController@show', $data) }} "> {{ $data->title }} </a></li>
@empty
empty!
@endforelse
</ul>
</dev>
</body>
</html>
結果
参考情報
https://laravel.com/docs/5.5/routing#implicit-binding