月: 2018年8月

  • hint: Updates were rejected because the tip of your current branch is behind

    hint: Updates were rejected because the tip of your current branch is behind

    はじめに

    git pushすると以下のようなエラーが出てrejectされることがある

    $ git push origin BranchName
    error: failed to push some refs to 'xxxx'
    hint: Updates were rejected because the tip of your current branch is behind
    hint: its remote counterpart. Integrate the remote changes (e.g.
    hint: 'git pull ...') before pushing again.
    hint: See the 'Note about fast-forwards' in 'git push --help' for details.
    $

    原因

    local branchが古い

    対処

    local branchを最新にする必要がある

    $ git pull origin BranchName
    From xxxx
     * branch            xxxx -> FETCH_HEAD
    Auto-merging xxxx
    Merge made by the 'recursive' strategy.
     xxxx | 1 +
     1 file changed, 1 insertion(+)
    $ 


  • invalid header field value “oci runtime error:

    invalid header field value “oci runtime error:

    はじめに

    docker execでコンテナの中に入ろうとした際、以下のようなエラーが吐かれ、中には入れなかった。

    # docker exec -it redash_postgres_1 /bin/bash
    rpc error: code = 13 desc = invalid header field value "oci runtime error: exec failed: container_linux.go:247: starting container process caused \"process_linux.go:75: starting setns process caused \\\"fork/exec /proc/self/exe: no such file or directory\\\"\"\n"
    # 


    対処

    yum updateしたら直った。。

    原因

    Dockerが古かった??

  • VyOSでルーティングを設定する

    VyOSでルーティングを設定する

    はじめに introduction

    CiscoライクなオープンソースのVyOSというOSSのrouterがある。
    メインのクラウドがAWSやGCPであればVyOSを使わなくてもよいが、さくらインターネットなどで作業をする際は、まだまだVyOSのお世話になることが多い。よくある手順をまとめた。

    There is an OSS router called Cisco-like open source VyOS. If your main cloud is AWS or GCP, you don’t need to use VyOS, but when you work on the Sakura Internet, there are still many things to take care of for VyOS. Summary of common procedures

    前提条件 Prerequisites

    IPは以下の通り

    IPs are below

    IP
    Global IP 200.20.0.2
    host192.168.0.11
    接続元IP100.10.0.1

    GlobalIPを追加する Add GlobalIP

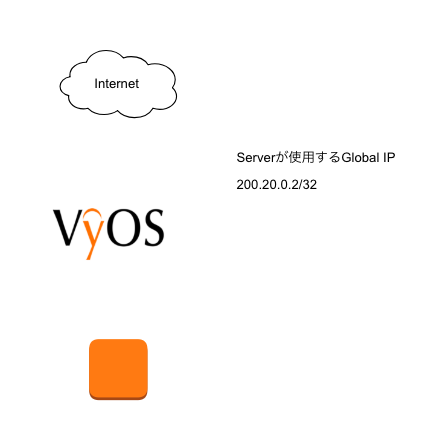
    追加するシステム(サーバ)に新しいGlobalIPを追加。今回は200.20.0.2/32を新しく追加する

    New GlobalIP is added to the system (server) to be added. Add 200.20.0.2/32 this time.
    # 使用するグローバルIPを定義
    # Define global IP to use
    set interfaces ethernet eth0 address '200.20.0.2/32'

    ポートフォワードの設定 Port forward settings

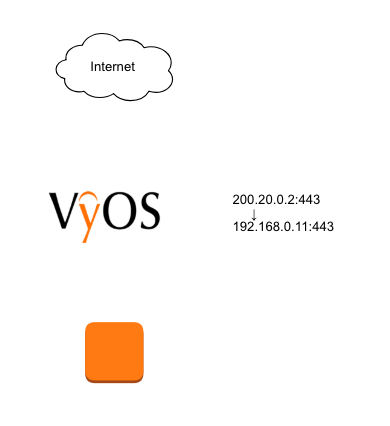
    “` 200.20.0.2:443“` に来たアクセスを、“` 192.168.0.11:443 “` に送る。今回はポートの変換を行わないが、この設定を変更することにより、サーバに届くポートを変更することが可能。

    Send the access that came at “` 200.20.0.2:443“`  to “` 192.168.0.11:443“`. This time, port conversion is not performed, but it is possible to change the port that reaches the server by changing this setting.
    set nat destination rule 100 destination address '200.20.0.2'
    set nat destination rule 100 destination port '443'
    set nat destination rule 100 inbound-interface 'eth0'
    set nat destination rule 100 protocol 'tcp'
    set nat destination rule 100 translation address '192.168.0.11'
    set nat destination rule 100 translation port '443'

    ※ rule 100の番号はユニークな値にすること

    * The rule 100 number must be a unique value.

    Firewall設定 Firewall settings

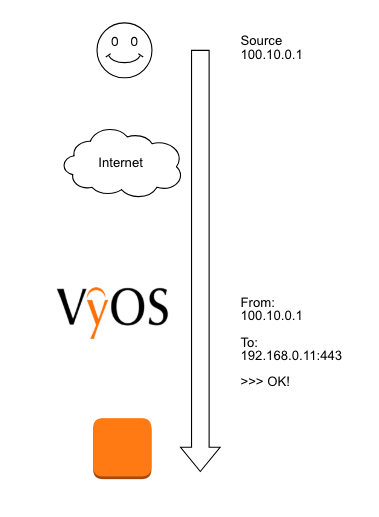
    設定したルーティングを全ての人に使わせず、限られた人のみ使わせたいことがある。今回は接続元のIPを限定する方法。 接続元 “` 100.10.0.1 “` からの接続のみ、“` 192.168.0.11:443 “` へ接続許可する

    There are times when you want to use only the limited people without using the set routing. This time, the method of limiting the connection source IP. Only connections from the connection source “` 100.10.0.1“`  are allowed to connect to “` 192.168.0.11:443“`
    # インターネット側からVyOSに対するファイアウォールを設定
    # Set firewall for VyOS from internet
    
    # 接続元100.10.0.1からの接続のみ、192.168.0.11:443へ接続許可
    set firewall name FW-eth0 rule 100 action 'accept'
    set firewall name FW-eth0 rule 100 destination address '192.168.0.11'
    set firewall name FW-eth0 rule 100 destination port '443'
    set firewall name FW-eth0 rule 100 protocol 'tcp'
    set firewall name FW-eth0 rule 100 source address '100.10.0.1'

    ※ rule 100の番号はユニークな値にすること

    * The rule 100 number must be a unique value.

    アウトバウンドのIPを設定 Set outbound IP

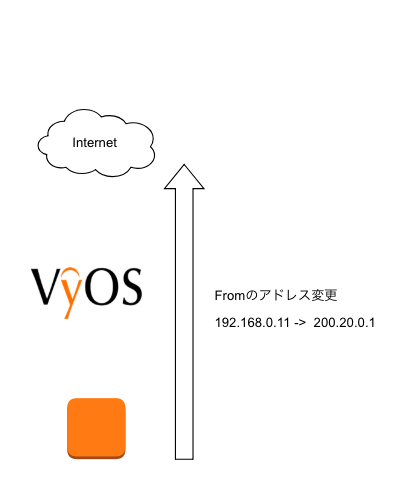
    この設定をしないと、インターネットの外にパケットが出て行くことができない。今回は“` 192.168.0.11“` のローカルIPを、グローバルIP “` 200.20.0.2 “`に変換する。

    Without this setting, packets cannot go out of the Internet. This time, the local IP of “` 192.168.0.11 “`  is converted to the global IP “` 200.20.0.2“`
    set nat source rule 100 outbound-interface 'eth0'
    set nat source rule 100 source address '192.168.0.11'
    set nat source rule 100 translation address '200.20.0.2'
    

    ※ rule 100の番号はユニークな値にすること  

    * The rule 100 number must be a unique value.

  • Docker版 redashをv5 (5.0) へupdate!

    Docker版 redashをv5 (5.0) へupdate!

    はじめに

    redash v5 (5.0)がリリースされた。

    https://discuss.redash.io/t/v5-beta-is-now-ready/2240

    今までは4.0.0-rc.1(ほぼlatest)を使っていたが、v5へupdateしたときの手順を記す。

    手順

    PostgreSQLのバックアップを取得

    docker ps
    docker exec -it redash_postgres_1 /bin/bash
    pg_dump -U postgres postgres | gzip > /tmp/redash_backup.gz
    exit
    docker cp redash_postgres_1:/tmp/redash_backup.gz .

    redashの停止

    # docker-compose -f docker-compose.production.yml down
    Stopping redash_nginx_1    ... 
    Stopping redash_server_1   ... 
    Stopping redash_postgres_1 ... 
    Stopping redash_worker_1   ... 
    Stopping redash_nginx_1    ... done
    Stopping redash_server_1   ... done
    Stopping redash_postgres_1 ... done
    Stopping redash_worker_1   ... done
    Stopping redash_redis_1    ... done
    Removing redash_nginx_1    ... done
    Removing redash_server_1   ... done
    Removing redash_postgres_1 ... done
    Removing redash_worker_1   ... done
    Removing redash_redis_1    ... done
    Removing network redash_default

    docker-composeファイルを修正

    # diff docker-compose.production.yml docker-compose.production.yml.20180808
    10c10
    <     image: redash/redash:5.0.0-beta.b4476
    ---
    >     image: redash/redash:4.0.0-rc.1
    26c26
    <     image: redash/redash:5.0.0-beta.b4476
    ---
    >     image: redash/redash:4.0.0-rc.1
    # 
    

    今までは4.0.0rc.1を使っていたが、そこを

    https://hub.docker.com/r/redash/redash/tags/

    の最新tagに変更した

    PostgreSQLをv5用にconvert

    # docker-compose -f docker-compose.production.yml run --rm server manage db upgrade
    Starting redash_redis_1 ... done
    Starting redash_postgres_1 ... done
    [2018-08-08 01:48:59,768][PID:1][INFO][root] Generating grammar tables from /usr/lib/python2.7/lib2to3/Grammar.txt
    [2018-08-08 01:48:59,850][PID:1][INFO][root] Generating grammar tables from /usr/lib/python2.7/lib2to3/PatternGrammar.txt
    [2018-08-08 01:49:03,702][PID:1][INFO][alembic.runtime.migration] Context impl PostgresqlImpl.
    [2018-08-08 01:49:03,703][PID:1][INFO][alembic.runtime.migration] Will assume transactional DDL.
    [2018-08-08 01:49:03,736][PID:1][INFO][alembic.runtime.migration] Running upgrade 969126bd800f -> 1daa601d3ae5, add columns for disabled users
    [2018-08-08 01:49:03,745][PID:1][INFO][alembic.runtime.migration] Running upgrade 1daa601d3ae5 -> d4c798575877, empty message
    [2018-08-08 01:49:03,761][PID:1][INFO][alembic.runtime.migration] Running upgrade d4c798575877 -> e7004224f284, add_org_id_to_favorites
    [2018-08-08 01:49:03,770][PID:1][INFO][alembic.runtime.migration] Running upgrade e7004224f284 -> a92d92aa678e, inline_tags
    [2018-08-08 01:49:03,777][PID:1][INFO][alembic.runtime.migration] Running upgrade a92d92aa678e -> 0f740a081d20, inline_tags
    [2018-08-08 01:49:03,782][PID:1][INFO][alembic.runtime.migration] Running upgrade 0f740a081d20 -> 71477dadd6ef, favorites_unique_constraint


    docker-composeを起動

    # docker-compose -f docker-compose.production.yml up -d
    redash_postgres_1 is up-to-date
    redash_redis_1 is up-to-date
    Creating redash_worker_1 ... 
    Creating redash_server_1 ... 
    Creating redash_worker_1
    Creating redash_server_1 ... done
    Creating redash_nginx_1 ... 
    Creating redash_nginx_1 ... done
    # 

    update確認

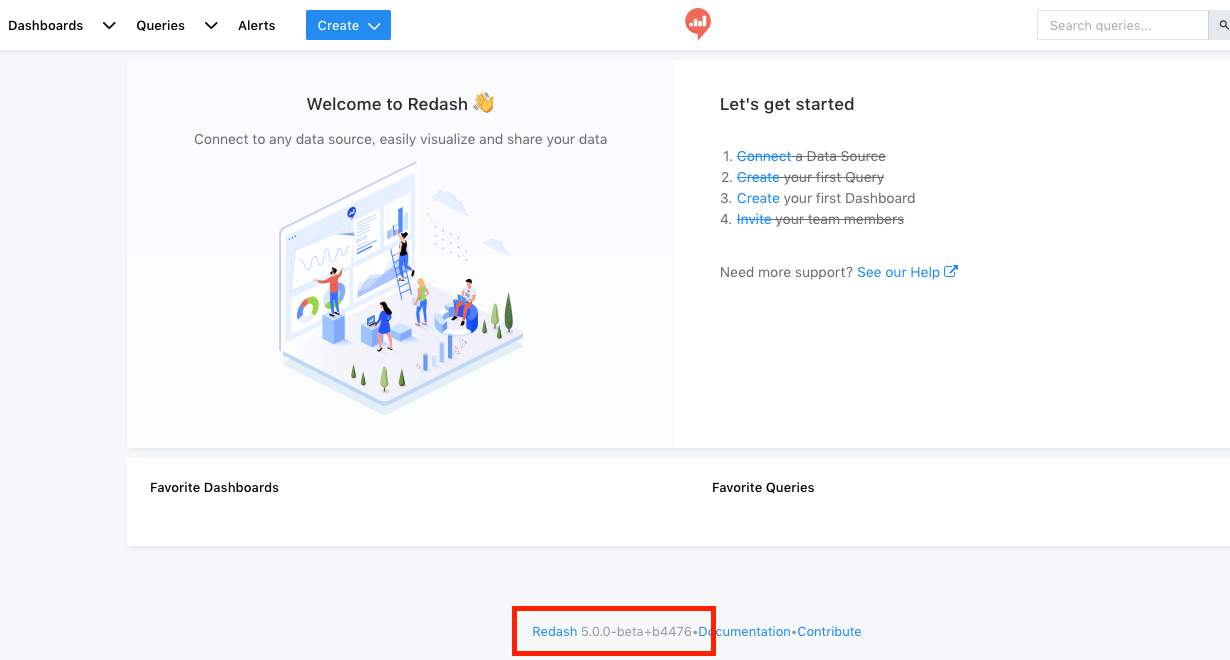
    今まで使っていたURLにアクセスすると、v5になったredashに接続が可能

    v5の感想

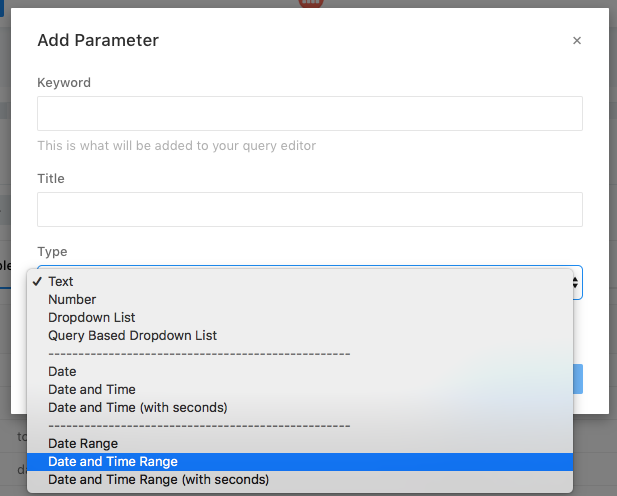
    Queriesに”Favorites”機能が追加されたり、パラメータをブラウザ経由で設定できたりと今までより使い勝手が向上。


    APIなどの機能テストをした後、本番もupdateしていきたい

    リストア(おまけ)

    今回は使わなかったけど、万が一databaseがおかしくなった場合、バックアップから復元することになる。その際の手順は以下の通り。一度drop databaseしたあと、バックアップしたデータを流し込む

    docker cp /tmp/redash_backup.gz redash_postgres_1:/tmp/redash_backup.gz
    docker exec -it redash_postgres_1 /bin/bash
    
    psql -U postgres template1
    DROP DATABASE IF EXISTS postgres;
    CREATE DATABASE postgres;
    \q
    zcat /tmp/redash_backup.gz | psql -U postgres -d postgres
    

    5.0.0-beta.b4476 から 現在のlatestへのupdate (2018/10/3 upadte)

    5.0.0.b4754 から 現在のlatestへのupdateは、docker imageを切り替えるだけで大丈夫なようだ。

    以下のように変更し、docker composeを立ち上げるだけでよい。

    <     image: redash/redash:latest
    ---
    >     image: redash/redash:5.0.0-beta.b4476

    5.0.0.b4754 から 現在のlatestへのupdateではDBのスキーマ変更は不要。


  • aws-cliでEC2を作成しEIPを付与

    aws-cliでEC2を作成しEIPを付与

    はじめに

    よく使うコマンドで、いつもはシェルでラップしているけど、ある部分だけ抜き出して実施したいこともある

    注意事項

    ある程度は環境変数にしてある。変更しやすいように

    手順

    接続するための鍵

    SSH_KEY_NAME=tsukada.pem

    マシン情報

    IMAGE_ID=ami-*****
    sequrity_group_id=sg-*****
    subnet=subnet-*****
    
    #インスタンスタイプを定義。以下はt2.smallを使うこととする
    instance_type=t2.small


    EC2作成

    サーバ作成

    aws ec2 run-instances --key-name ${SSH_KEY_NAME} --image-id ${IMAGE_ID} --count 1 --instance-type ${instance_type} --security-group-ids ${sequrity_group_id} --subnet-id ${subnet} > create-server.json


    インスタンスにタグ付け

    # 今回立ち上げたいインスタンスの名前を定義する。
    INSTANCE_NAME=tsukada-test01
    instance_id=`cat create-server.json | jq -r .Instances[].InstanceId`
    
    aws ec2 create-tags --resources $instance_id --tags Key=Name,Value=${INSTANCE_NAME}

    Elastic IP付与

    aws ec2 allocate-address --domain vpc > ElasticIP.json

    ElasticIP にタグ付け

    allocation_id=`cat ElasticIP.json| jq -r .AllocationId`
    EIP_name=tsukada-eip
    aws ec2 create-tags --resources ${allocation_id} --tags Key=Name,Value=${EIP_name}

    ElasticIPをEC2インスタンスに紐付け

    aws ec2 associate-address --allocation-id ${allocation_id} --instance ${instance_id}
    
    SERVERIP=`cat ElasticIP.json | jq -r .PublicIp`

    接続

    ssh ec2-user@ `cat ElasticIP.json | jq -r $SERVERIP`


  • “transport: dial unix /var/run/docker/containerd/docker-containerd.sock: connect: connection refused”: unknown

    “transport: dial unix /var/run/docker/containerd/docker-containerd.sock: connect: connection refused”: unknown

    TL;DR

    dockerが高不可に陥ると本エラーが発生することがある  

    This error may occur if docker falls into high

    原因 problem

    Dockerを動かしているサーバ(ホスト)と、Dockerコンテナの通信の不通

    Communication failure between the server (host) running Docker and the Docker container

    解消 deal

    いろいろ調べたけどdocker自体を再起動するしかなさそう。

    I checked a lot, but it seems that docker itself can only be restarted.

    systemctl restart docker

    恒久対策を検討中  

  • AWSでkusanagi (wordpress高速化マシン) を使う落とし穴

    AWSでkusanagi (wordpress高速化マシン) を使う落とし穴

    はじめに

    AWSで稼働しているwordpressのmysqlが突如down!
    原因を探っていくと、高負荷時にOutOfMemoruになりOOM Killerが発動したことがわかった

    原因

    AWSのkusanagi AMIはデフォルトでswap設定されていない。デフォルトでswapの設定がされてなく、memoryがフルになると、すぐにOOM killerが発動されてしまう

    対処

    swapの設定を適切にした

    cat /proc/swaps
    dd if=/dev/zero of=/swapfile bs=1M count=2048
    chmod 600 /swapfile
    mkswap /swapfile
    swapon /swapfile
    free -m

    fstabにswapfileの設定を追加

    /swapfile   swap        swap    defaults        0   0

    加えてやったこと

    かなり簡易的な監視だけど、もし必要なミドルウェアが落ちてしまった場合、自動で立ち上げるようcronをいれた。

    * * * * * ps ax |grep -v grep | grep -q mysql || sudo systemctl start mysql
    * * * * * ps ax |grep -v grep | grep -q nginx || sudo systemctl start nginx

    その後安定稼働している