

はじめに
Gitと連携させCIを動かす事が増えて来た。GitHubと連携させTravis CIもいいし、Circle CIもいいだろう。GitLab CIのいいところは、自前で環境さえ準備できさえすれば非常に低コスト(IaaSの運用コストのみ)で動かす事ができるのが魅力だ
設定方法
前提条件
GitLabが動作できていること
本手順は、GitLab 10.3.7を前提としている
GitLabの設定
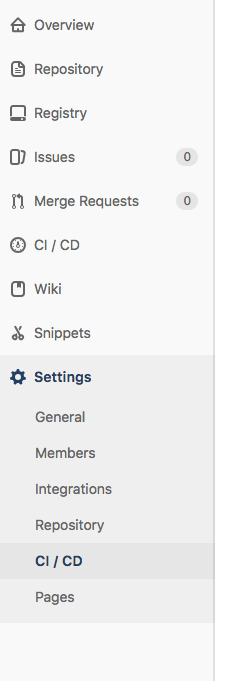
GitLabの左メニューで Settings -> CI/CDを選択する
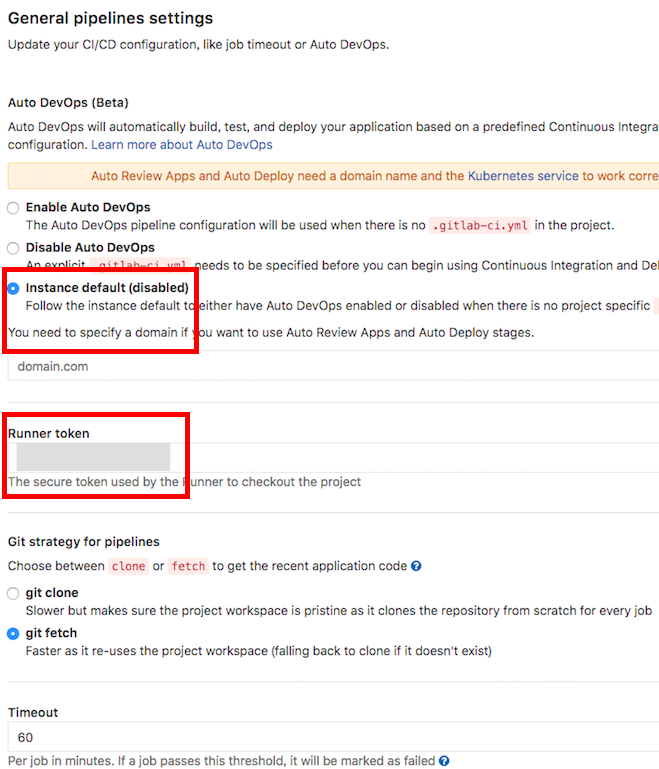
General piplines settingsで
「Instance default」を選択し、Runner Tokenをひかえる
CIサーバ側の設定
GitLab CIサーバでGitLab runnerの設定をいれる
# sudo gitlab-runner register

Running in system-mode.

Please enter the gitlab-ci coordinator URL (e.g. https://gitlab.com/):
https://git.sumito.jp/
Please enter the gitlab-ci token for this runner:
SJxxxxxxxxxxxx
Please enter the gitlab-ci description for this runner:
[server]: projectA
Please enter the gitlab-ci tags for this runner (comma separated):

Whether to lock the Runner to current project [true/false]:
[true]: true
Registering runner... succeeded runner=xxxxxxx
Please enter the executor: parallels, ssh, virtualbox, docker+machine, docker-ssh+machine, docker, docker-ssh, shell, kubernetes:
shell
Runner registered successfully. Feel free to start it, but if it's running already the config should be automatically reloaded!
automatically reloaded!と表示されれば設定は問題ない
.gitlab-ci.ymlの設定
.gitlab-ci.yml
variables:
AMI_ID_KUSANAGI: "ami-123456"
INSTANCE_NAME: "${CI_COMMIT_REF_NAME}_${CI_COMMIT_SHA}_${CI_PIPELINE_ID}"
TMP_ANSIBLE_DIR: "/tmp/gitlab/${CI_COMMIT_SHA}/${CI_PIPELINE_ID}"
DEPLOY_SITE: "wordpress"
SSH_KEY_NAME: "ssh-key"
INSTANCE_LOG: "/tmp/gitlab/${CI_COMMIT_SHA}/${CI_PIPELINE_ID}/run-instances.json"
ALLOCATE_ADDRESS_LOG: "/tmp/gitlab/${CI_COMMIT_SHA}/${CI_PIPELINE_ID}/allocate-address.json"

stages:
- initial
- build
- test
- deploy
- cleanup

########################################################
# STAGE:ANCHORS #
########################################################

# These are hidden jobs that contain the anchors
.server_group_1:
only: &kusanagi_servers
/^(wordpress).*$/

########################################################
# STAGE:INITIAL #
########################################################
make_tmp_directory:
stage: initial
script:
- mkdir -p ${TMP_ANSIBLE_DIR}

# デプロイテスト用インスタンスを作成@kusanagi& t2.medium
run_aws_server_kusanagi:
stage: build
only:
- *kusanagi_servers
script:
# インスタンスを作成
- aws ec2 run-instances --key-name ${SSH_KEY_NAME} --image-id ${AMI_ID_KUSANAGI} --count 1 --instance-type t2.medium --security-group-ids sg-12345678 --subnet-id subnet-12345678> ${INSTANCE_LOG}
# インスタンスにタグ付け
- instance_id=`jq -r .Instances[].InstanceId ${INSTANCE_LOG}`
- aws ec2 create-tags --resources $instance_id --tags Key=Name,Value=${INSTANCE_NAME}
# ElasticIPを払い出してタグ付け
- aws ec2 allocate-address --domain vpc > ${ALLOCATE_ADDRESS_LOG}
- allocation_id=`jq -r .AllocationId ${ALLOCATE_ADDRESS_LOG}`
- aws ec2 create-tags --resources $allocation_id --tags Key=Name,Value=${INSTANCE_NAME}
# インスタンスのステータスがrunningになるまで待つ
- i=1; while [ $i -le 120 ]; do sleep 3; if [ "\"running\"" = `aws ec2 describe-instances --instance ${instance_id} | jq '.Reservations[].Instances[].State.Name'` ]; then break; fi; i=$(expr $i + 1); done
# ElasticIPをインスタンスに紐付け
- aws ec2 associate-address --allocation-id ${allocation_id} --instance ${instance_id}

# Ansible Playbookをgit clone
setup_git:
stage: build
script:
- cd ${TMP_ANSIBLE_DIR}
- git clone git@git.sumito.jp:sumito/projectA.git
- cd projectA
- git checkout ${CI_COMMIT_REF_NAME}

########################################################
# STAGE:TEST #
########################################################
# 全てのAnsible Playbookの構文チェック
check_syntax_ansible:
stage: test
before_script:
- sed -e s%__ROLES_PATH__%${TMP_ANSIBLE_DIR}/projectA/Ansible/roles%g /home/gitlab-runner/.ansible_template.cfg > /home/gitlab-runner/.ansible.cfg
- cd ${TMP_ANSIBLE_DIR}/projectA/Ansible
script:
- ansible-playbook -i inventories/staging/hosts sites/staging/wordpress.yml --syntax-check

########################################################
# STAGE:DEPLOY #
########################################################
# Ansible Deployを実行
execute_ansible:
stage: deploy
only:
- *kusanagi_servers
before_script:
- elastic_ip=`jq -r .PublicIp ${ALLOCATE_ADDRESS_LOG}`
- cd ${TMP_ANSIBLE_DIR}/projectA/Ansible
- sed -si -e s/__IP__/${elastic_ip}/g -e s%__KEY__%/home/gitlab-runner/.ssh/${SSH_KEY_NAME}%g inventories/staging/hosts
- sleep 20
script:
- ansible-playbook -i inventories/staging/hosts sites/staging/${DEPLOY_SITE}.yml -u sumito --limit ${DEPLOY_SITE} --vault-password-file=/home/gitlab-runner/.vault_password

########################################################
# STAGE:CLEANUP #
########################################################
# Deployテストしたサーバリソースを削除@on_success
remove_aws_server_success:
stage: cleanup
only:
- *kusanagi_servers
before_script:
- instance_id=`jq -r .Instances[].InstanceId ${INSTANCE_LOG}`
script:
- sh /home/gitlab-runner/bin/aws/terminate-instance.sh $instance_id
after_script:
- rm -rf ${TMP_ANSIBLE_DIR}

# Deployテストしたサーバリソースを削除@on_failure
remove_aws_server_manual:
stage: cleanup
only:
- *kusanagi_servers
before_script:
- instance_id=`jq -r .Instances[].InstanceId ${INSTANCE_LOG}`
script:
- sh /home/gitlab-runner/bin/aws/terminate-instance.sh $instance_id
after_script:
- rm -rf ${TMP_ANSIBLE_DIR}
when: manual
どのように動くか
今回実施したPipelineは
“`
stages:
– initial
– build
– test
– deploy
– cleanup
“`
の順番で処理が行われるよう骨格を作った。

AWSのインスタンスをたちあげ、環境をセットアップし、ansibleを流す。最後にはテストで使ったイメージを削除するPipeline
gitにpushする度にCIが動くようになり、品質が担保できるようになった。